Linen hemd
Now that the apron is finished, I'd like to make a new hemd.


I have been going back and forth on what style of hemd to make - a high-necked one or a lower cut one. I decided to remake the hemd I originally tried by following a tutorial by Katafalk. The linen I am using is very sheer and is nothing like the cotton muslin that I used for the first hemd.
The muslin is one of the very first garments I made, back when I thought making a mock up meant making the WHOLE thing like a literal dress rehearsal. It's a bit stiff and the neck came up a bit higher than I find comfortable, but other than that I'm very pleased with the comfort and fit in the rest of the body. Therefore I'm going to use (mostly) the same measurements. As always, this post is a record of "how I did", not necessarily a "how to do". If you wish to make this beautiful garment, please follow Katafalk's excellent tutorial.
The cotton muslin of the first hemd, above, pleated perfectly so I am starting out the second hemd with a bit of trepidation. What is the sheer linen going to look like once it's all gathered into the neck? I guess we will see.
There's the light linen for the hemd. It's almost scandalous at how sheer it is.
I pulled threads and cut out the four sections. Here's me planning how to cut the linen to minimize scraps.
It worked! Then I sewed them together with a basting stitch, then a backstitch to make a giant tube, just about 15cm from the neck down.
I felled the seams like so:
And then I hemmed the neck in preparation for smocking. I almost made a "boo boo", but luckily the last panel was a long one, and I could cut the neck slit and get that hemmed without much undoing of work.
Then it was time to gather it all up into the neckline.
I clipped on a paper guide and then made dots:
Next I ran gathering strings by just picking up a few strands behind the marking.
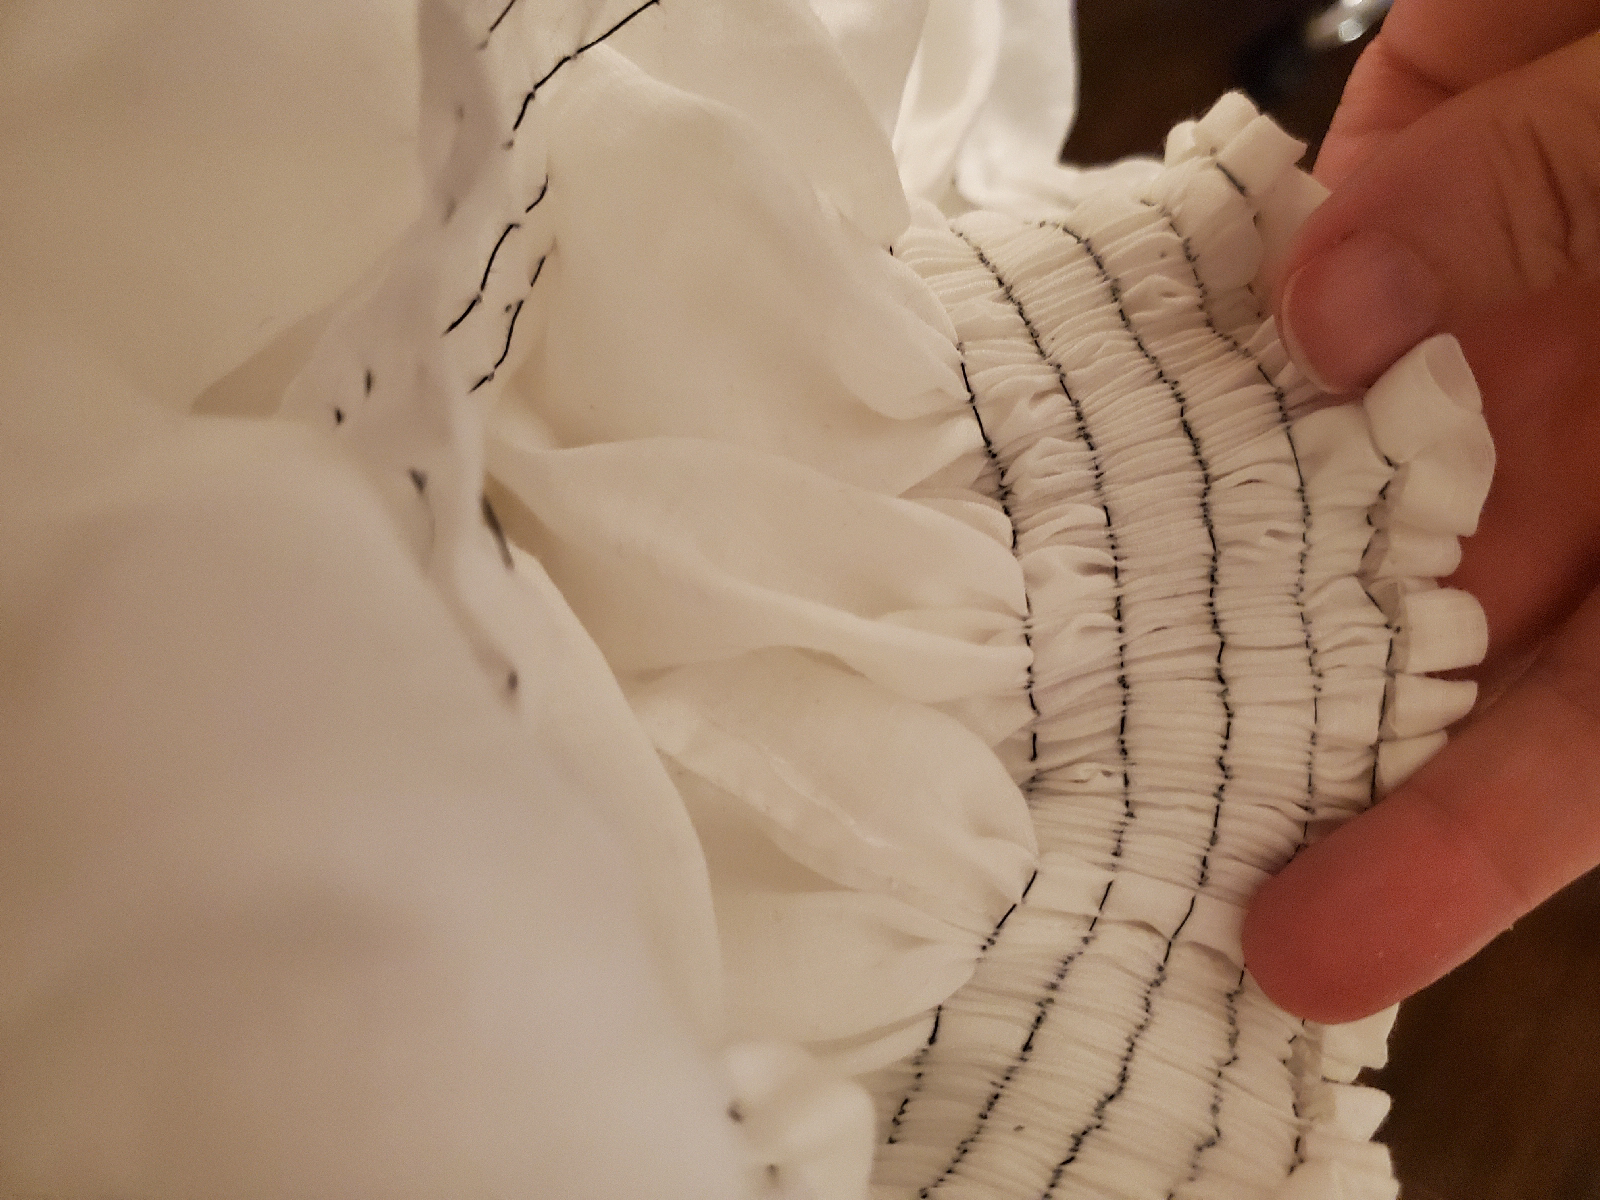
And finally the moment of truth. I pulled the fabric close and it ended up looking great. Here's the front...
And the back...
But as I feared, the thin fabric fully gathered, tightly enough to embroider on, was about 7-10 cm too narrow for my neck. New plan required.
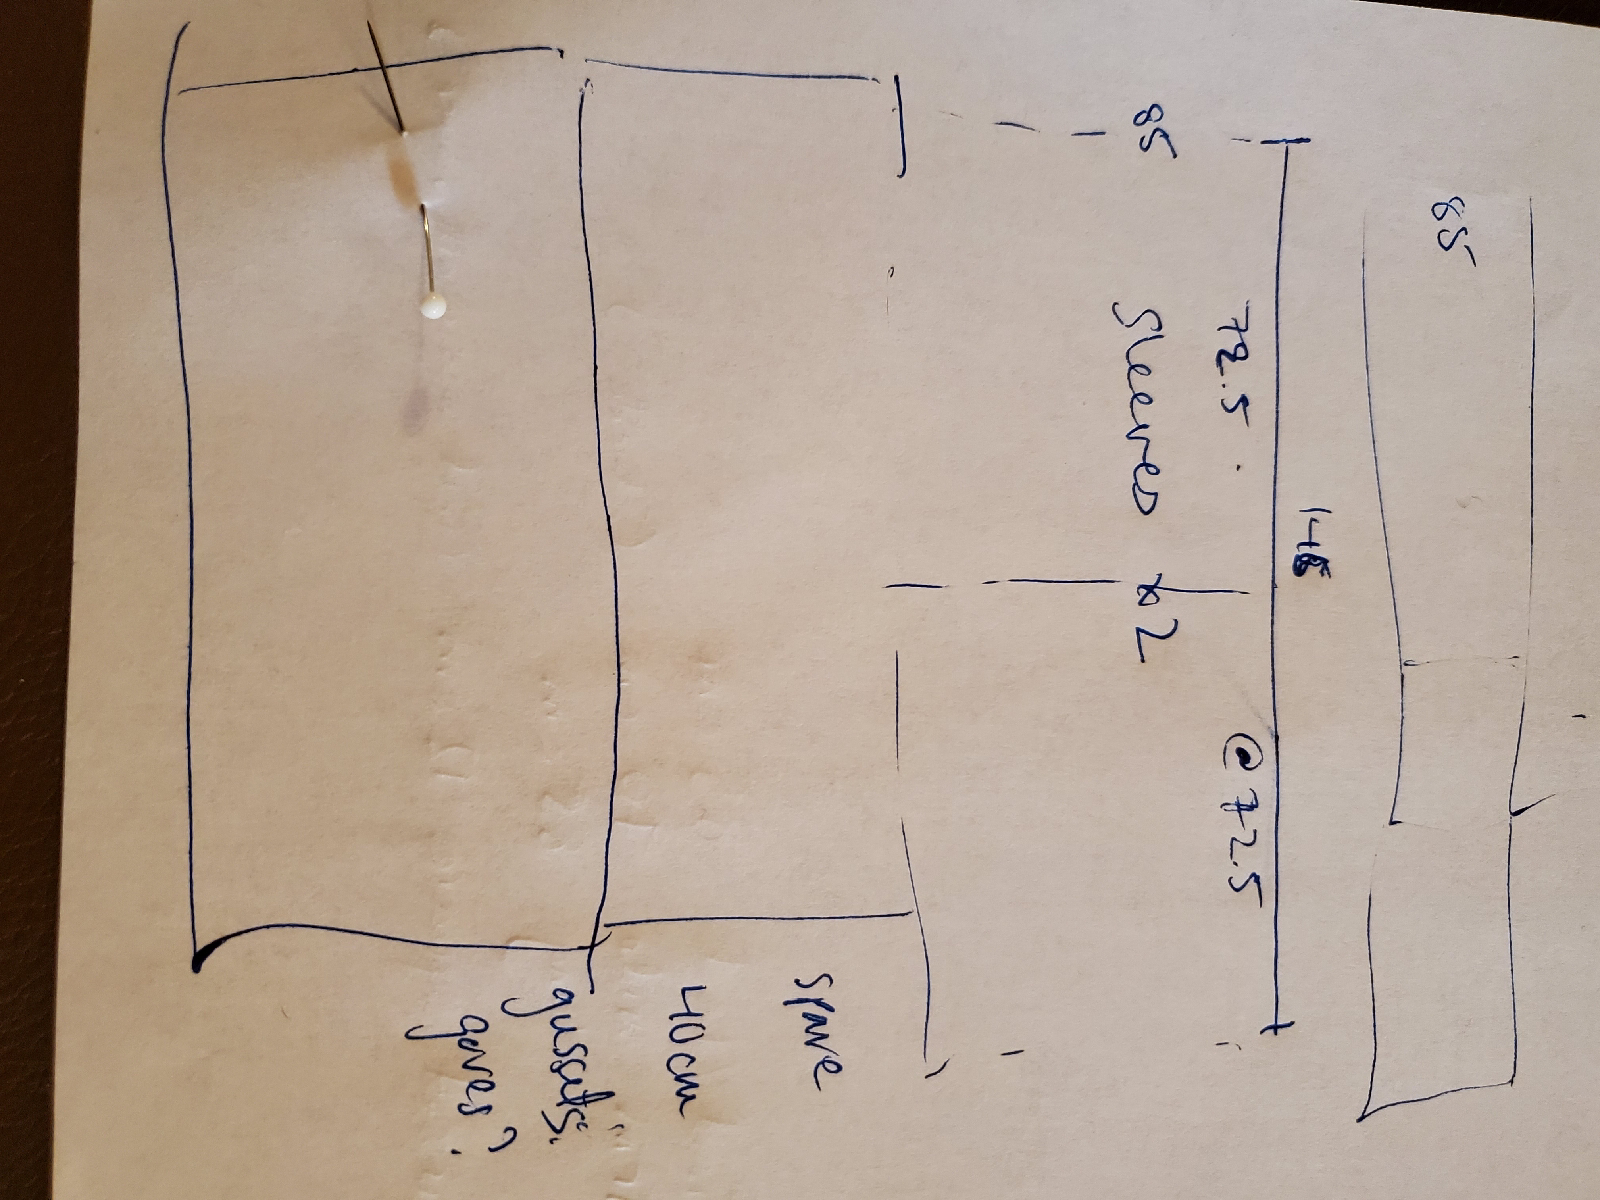
After peppering my dear friend with a lot of questions and comments, I've decided to line the collar on the back and move on! I can always return to the collar if I want to redo it. I'm actually thinking of going in with 1/2 cm gathers and then embroidering on top, but moving on. This is the revised plan.
With the concept cemented, time to move on to gussets. I cut 12cm square pieces and measured from the top to the arm pit area - approximately 31 cm. That's where the gussets are going to start. I offset the pieces by 1/2 cm so I could fell without having to cut.
I had a little trouble with the first gusset, as I insert it way too late one night and picked up the wrong piece of fabric. I even basted them on like so...
But I went ahead with a rapidly improving backstitch before checking. I'll never make that mistake again. After some unpicking and rebasting, here's the attached gusset.
I then basted in a couple gores, which I wasn't going to do except the hemd was a little snug against the hips. With everything basted in place, I used a running backstitch to get everything ready for felling. I figured from the waist down, a running backstitch was going to be sufficient as there won't be much stress on the seams.
Obligatory cat as helper.
Here's the running backstitch on the gores. My hand sewing is definitely improving.
I backstitched the sides and down the length of the arms, then hemmed the cuffs. All ready for felling.
I felled the sides and the arms, leaving the gussets for last. They are fussy. The felled seams look pretty good. Not perfect but I'm very happy with them. Again, I'm pleased with how my hand sewing has improved.
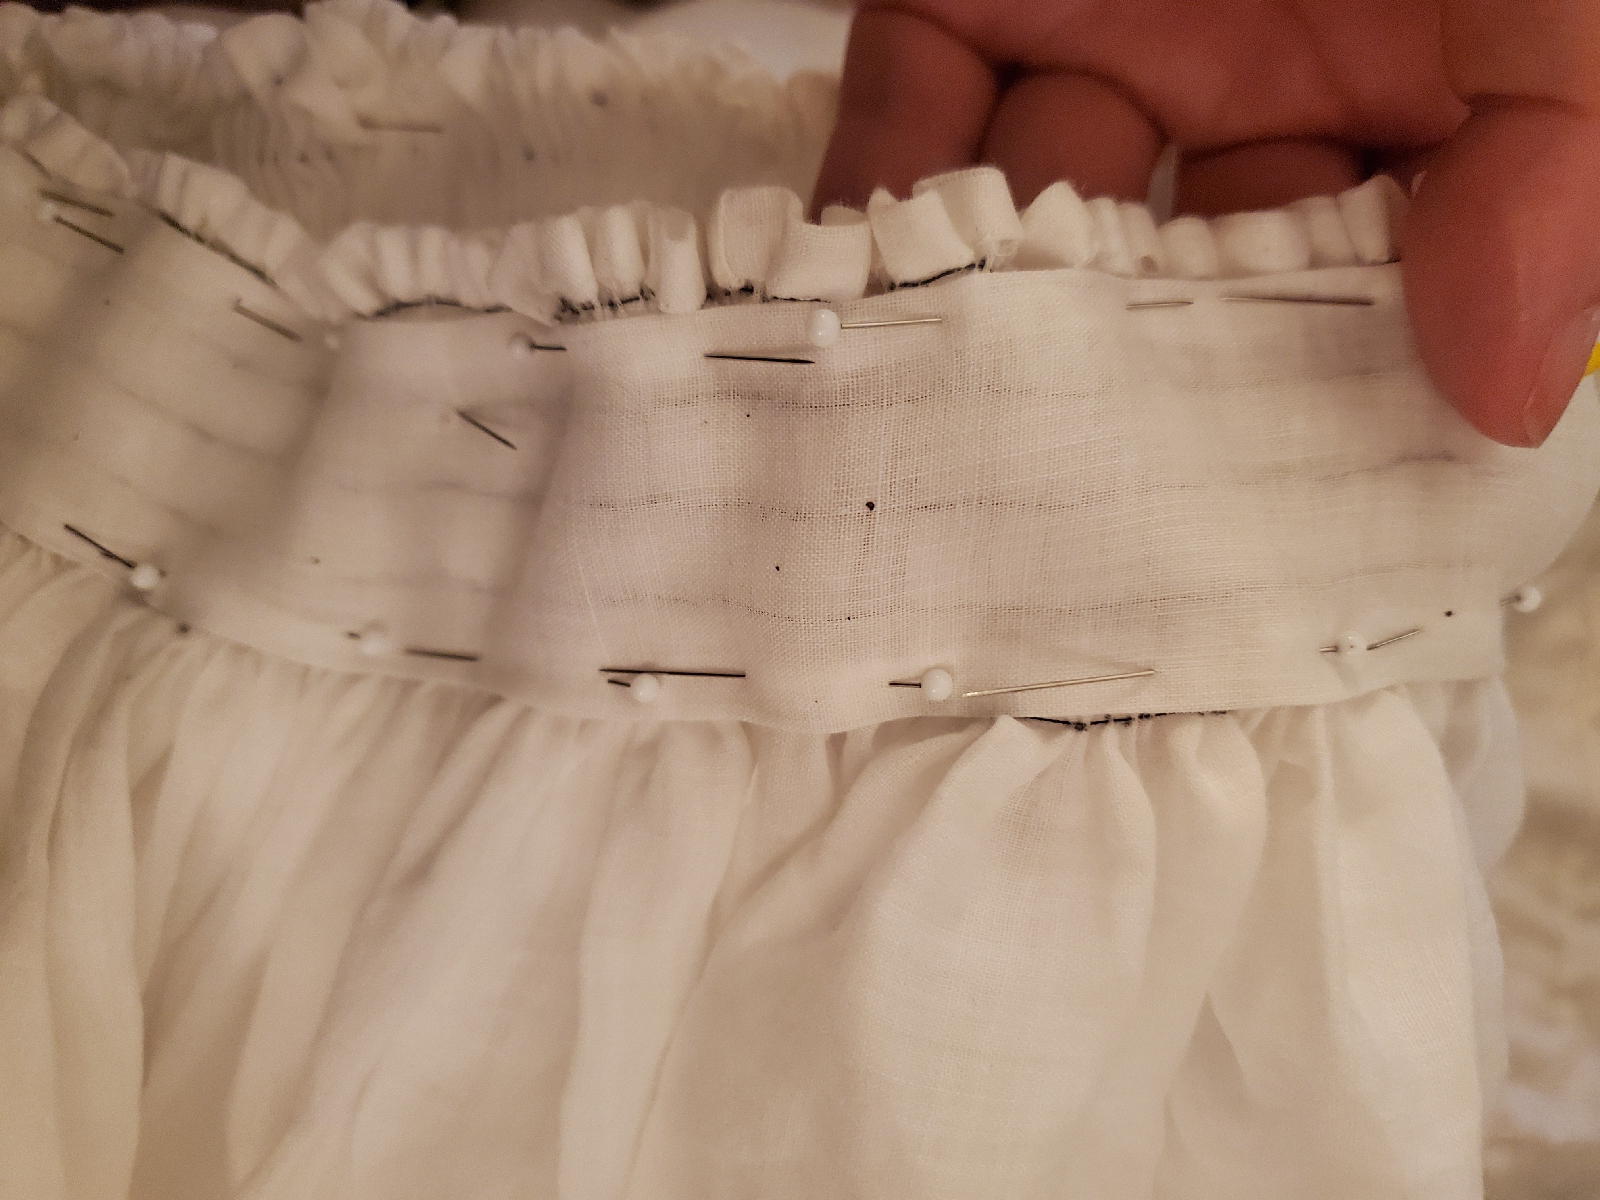
Then I lined the neck. This took some "figuring it out" but I ended up pinning the lining like so.
And then I just whipped stitched it on. It's not as neat as I would like, but I think it will hold ok. Like the smocked apron, I should have put in an additional gathering string to stabilize the bottom hem. But at some point I just need to keep moving forward.
I cut and pulled the strings, and then tucked the collar edge under and sewed it up.
It's ok, but not my strongest work on this garment. Moving on...
I decided to leave the sleeves ungathered for now, and will wait to finalize the closure until after I decide about embroidery... so after putting a hem on the bottom it's suddenly... just... done.
I'm very pleased with this hemd and can't wait to wear it!
In service,
AW

